#> Loading required package: floodam.building
library(floodam.building)

# set up a temporary model folder
output_path = file.path(tempdir(), "input/model/generated/generated_model")
model_path = list(
  data = file.path(tempdir(), "input"),
  output = file.path(tempdir(), "output")
)

# create this directory where you want to create the model
dir.create(output_path, recursive = TRUE)
Generate a simple building model
2026-06-29
Generate a simple building model
This vignette shows how to generate a simple building layout with generate_model(), inspect the generated geometry, and prepare it for analysis by converting it into a YAML-compatible building structure. The goal is to give you a fast, repeatable way to build test cases and prototype flood vulnerability workflows without starting from an existing input file.
Generate a model
First of all we need to load the package and set up a temporary folder to store the generated model.
The generate_model() function creates a simple building layout with a specified number of rooms and total floor area. You can also specify wall thicknesses (m) for exterior and interior walls and the first floor elevation (cm).
model = generate_model(n_room = 5, surface = 80, H = 100, dilapidation = .2,
height = 400)- The returned object is a list of two components:
- The building structure with the rooms/walls/floors geometry and materials
- The building furnitures prices distributed by room
Convert to a YAML-like structure
As for now, you this object is not a model yet. Therefore you can’t use any of the analysis (analyse_model() and analyse_hydraulic()) functions on it. You need to convert it into a YAML-like structure and save it with a simple function write_model_generated(). You can always edit later the CSV file to customize the furniture price or placement if needed.
write_model_generated(output_path, model)Final model
These files create a complete, loadable building model structure. Once the YAML and furniture files are written, you can use analyse_model() to import the generated building and run the package analysis pipeline.
# Modeling
model = analyse_model(
    model = "generated_model",
    type = "generated",
    stage = c("load", "extract", "damaging", "hydraulic", "display"),
    type_building = "yaml",
    path = model_path
)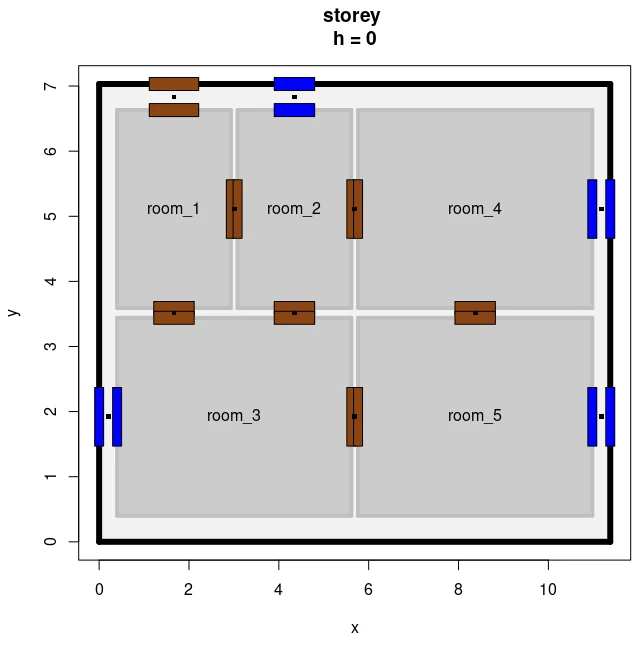
Congratulations! You got you model of your own.You can now use the model object to generate limnigraphs, run hydraulic and damage analysis, and visualize results as needed.